· Wade Corrigan
Bow Stabilizer Setup, Step by Step
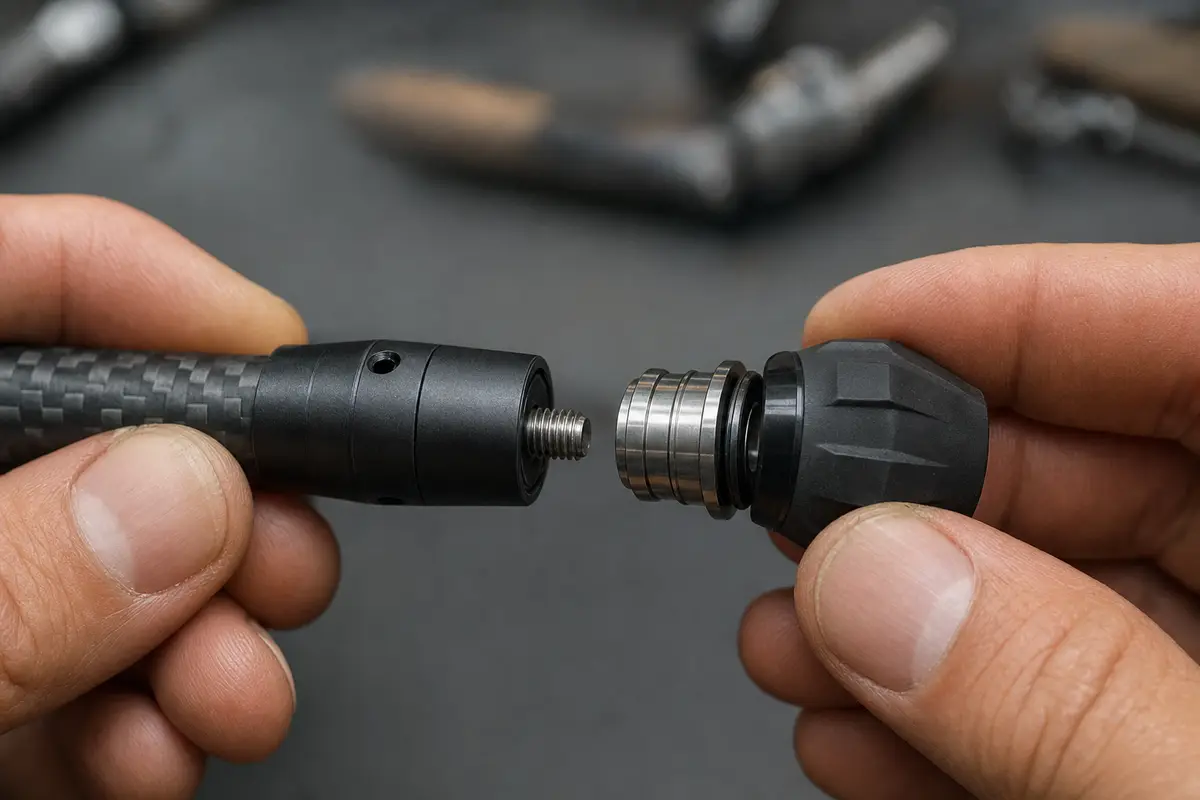
Stabilizer setup has a reputation for being mysterious, and it doesn't deserve it. There are exactly three parts to the job: putting the bar on, reading what your bow is telling you, and adjusting the weight until the two of you agree. What ruins most setups isn't a lack of secret knowledge — it's impatience, usually in the form of changing three things at once. This guide walks the process in order, using the SteadyDraw carbon bow stabilizer as the reference hardware, and it applies whether you shoot a compound or a recurve. Haven't picked a bar yet? Sort that out first with the stabilizer length guide — length decides more than any adjustment below.
US monthly searches for "stabilizer weights archery" — the single most-asked stabilizer setup question, well ahead of mounting or balance queries
— DataForSEO keyword data, US, 2026
What a good setup actually feels like
Notice what's not on that list: any promise about group sizes. A stabilizer removes reasons to miss — wobble, torque, vibration — but it doesn't aim the bow for you. Set your expectations there and the process gets much less frustrating. Every adjustment below is judged against those three feelings, on your bow, with your draw. There is no universal "correct" configuration to copy from someone else's rig.
Step 1: Mount the bar
The SteadyDraw's fittings use a standard archery thread size, so they seat in any modern riser's accessory bushing — that's the spec sheet, and across the buyers we've heard from, nobody has reported a riser it wouldn't thread into. Hand-tight is genuinely tight enough: the bar should be snug so it doesn't work loose from shot vibration, but there's nothing to be gained by cranking on it with pliers, and a chewed-up bushing is an expensive way to learn that. Give it a quick check for snugness every few sessions, the same way you'd check your sight screws. If you want the hardware side of that bushing explained properly, our bow stabilizer thread size guide covers the 5/16-24 standard, adapters and the other mounting holes on a riser.
Step 2: Read the balance
This two-part check — at rest, then at full draw — is the whole diagnostic toolkit, and it costs nothing. At rest you're learning the bow's static balance: with a front bar mounted, expect it to want to roll gently forward, which is normal and even useful, since a slightly forward-committed bow follows through toward the target instead of jumping back at your face. At full draw you're learning the dynamic picture: how fast the pin wanders and whether it wanders evenly. Standard range safety applies every time — never draw a bow pointed anywhere but a safe target, and never let the string go without an arrow, because a dry-fire can wreck a bow.
Do the full-draw check at the end of a session too, not just the start. A setup that feels great on shot five can feel like an anchor on shot forty, and fatigue is exactly the variable weight tuning is supposed to manage.
Step 3: Tune with the weights
More tip weight means more resistance to wobble and a calmer pin — up to the point where your front shoulder starts paying for it. Less weight means a livelier, easier-carrying bow that doesn't hold quite as still. Neither is wrong; they're just different answers for different shooters and different days. The advice is to start with the counterweight fitted, shoot a full session, and only strip it if you feel the hold getting heavy late. Hunters who carry a bow all day often land on less weight than range shooters — a pattern the hunting stabilizer guide covers in more depth.
For reference, here's what each complete SteadyDraw weighs with the counterweight fitted — the hand measurements, listed with the caveat "manually measured, slight deviations may occur": 314.2 g for the 6-inch, 319.2 g for the 8-inch, 322.5 g for the 10-inch, 330 g for the 12-inch, and 346.7 g for the 15-inch.
the measured weight range across all five SteadyDraw lengths with the stainless counterweight fitted — the same tuning system on every bar
— SteadyDraw bench measurements, 2026
Stabilizer weights: how much do you actually need?
"How much weight" is the most-searched stabilizer question there is, and the uncomfortable truth is that nobody can answer it from a distance — not because it's complicated, but because the limiting factor is your shoulder, and I can't see your shoulder from here. What I can give you is the failure mode to avoid: stacking on weight because a target archer on the internet shoots that way, feeling heroic for ten shots, and then watching your pin float get worse as fatigue sets in. Weight that steadies shot five and ruins shot thirty is a net loss. Judge every configuration over a complete session, and remember that moving up a bar length is often the smarter way to gain steadiness than maxing out tip weight — leverage does the work without demanding as much muscle.
When to think about a side bar
Side bars solve a real problem, but it's a problem you should confirm you have before spending on it: a bow that consistently leans toward its accessory side even after the front bar is dialed. If that's you, a side bar is the right tool, and nothing about the SteadyDraw's setup changes — it stays on the front bushing doing the same job. Two honest cautions, though. First, competition rules: NFAA bowhunter equipment styles allow a single straight stabilizer and prohibit forked attachments and counterbalances, so a side bar can move you out of your class — check your rulebook. Second, sequence: every archer I've watched add a side bar to an untuned front bar ended up with two problems instead of one. Front bar first, always.
What a rear bow stabilizer does to the balance
Everything on a bow rotates around your bow hand, and the two bars work opposite ends of that pivot. A front stabilizer puts its mass well out ahead of the grip, where a modest amount of steel resists a great deal of rotation — that leverage is what the length guide is really about. A rear bow stabilizer sits behind your hand and much closer to it, so leverage is not what it trades on. It cancels a standing lean instead: the tilt a loaded quiver and a sight put into the bow before you have even drawn.
Which is why the at-rest check in Step 2 tells you whether a back bar has any work to do here. A bow that sits square once the front bar is fitted has no lean left to cancel. One that still rolls toward its accessory side is showing the symptom back bars exist for — and it mounts nowhere near the front bushing, on a second threaded position our thread size guide covers.
Splitting the weight front to back, and what the angle changes
The forward commitment described in Step 2 is the thing to protect. A bow that wants to roll gently forward follows through toward the target; a bow pulled rear-heavy jumps back at your face on release. So the split is not a ratio to copy off someone else's rig, it is a boundary: keep adding behind the grip only while the bow still tips forward on relaxed fingers. Past that point, a longer front bar was the simpler way to buy the steadiness.
The mount angle is the other half of the same adjustment. A rear bar swung well out to the side puts its mass across the bow: maximum help with a lean, very little effect on how it tips front to back. Tuck the same bar in close, aim it down and back, and that flips. Everywhere between, the angle moves both at once — which is why the one-change-one-session rule matters more here than anywhere else in this guide. The rulebook caution above applies to every one of these.
SteadyDraw stabilizers sold to date across the five lengths — every one of them tuned with the same detachable counterweight-and-damper piece described here
— SteadyDraw sales data, 2026
The classic setup mistakes
Nine years of watching people set up stabilizers, condensed into the five errors that cause nearly all the grief:
- Changing everything at once. New bar, weight stripped, new grip pressure, same afternoon. When the bow feels different, you'll have no idea which change did it. One change, one session, every time.
- Too much weight, too fast. The single most common error. Steadiness you can't sustain for a full session isn't steadiness — it's a countdown.
- Judging a setup on ten shots. Fresh arms make everything feel good. The verdict that matters comes at the end of a session, not the start.
- Copying someone else's rig. A target shooter's configuration reflects their draw weight, their class rules and their zero-walking shooting day. Your ground and your shoulders get a vote.
- Wrenching the bar down. Snug by hand, checked occasionally, is the whole spec. Over-tightening risks the bushing and fixes nothing.
Settle it, then leave it alone
The goal of stabilizer setup is to stop doing stabilizer setup. Mount it, read the balance, tune the counterweight over a few sessions — then stop touching it and spend your attention on shooting. If you're starting from zero, the what-a-stabilizer-does explainer and the honest market comparison round out the background, and the length guide will match a bar to your shooting. The SteadyDraw ships free in the US with a 30-day money-back guarantee, so you can run this whole process on your own bow at no risk.
Front and back bar setup FAQ
Do I need a back bar as well as a front stabilizer?
Set the front bar up first and let the bow answer that. A front stabilizer deals with wobble and pin float, which is what most hunters and club shooters came for. A back bar deals with one leftover symptom: a bow still leaning toward its accessory side once the front bar is tuned. No lean, nothing to trim.
Where does a rear bow stabilizer mount on the riser?
Not in the front bushing your SteadyDraw screws into. Plenty of compound risers carry a second threaded position behind or beside the grip, used for back bars and V-bar mounts. Look at the back face of your riser before planning anything, because not every riser is drilled for one — and the position and the angle you set it at are what change the balance, not the hardware.

Wade Corrigan · Bowhunter & archery gear tester, 9 yrs
Wade has spent nine years hunting and shooting 3D courses, testing stabilizers, sights and release aids for real-world balance, vibration and noise — not spec-sheet promises.
Written by Wade Corrigan · See our testing methodology.